Homemade Paneer Cheese


Summary


Paneer (also spelled Panir)  – a cheese originate and made in India. Paneer is also called Queso Blanco (kay’so blan’ko) (white cheese) in Latin America. It is a bland cheese that is kind of rubbery and will not melt.


Paneer is sometimes called “Vinegar Cheese” because vinegar is used as an “acid precipitant”, that is, the acid of the vinegar (along with higher heat) makes the curds separate from the whey. The cheese cannot be made using low temperatures.


A wonderfully tasty food source and excellent meat extender. You can actually, sprinkled with seasoned salt and serve as a snack . It is also one of the few cheeses that freezes well, so you can stock up for the dry times.


How to make Paneer


Goat milk queso blanco cubes


Paneer is easy to make and there is so much you can do with it. Paneer  is perfect for “first timers” but even the more advanced can try it or try it again. It is quick and simple to make, and takes very little special equipment.


Instructions:


You can use as much goat milk as you’d like, 1 gallon or much more as long as your pot is big enough. Do not use an aluminum pot. Over direct heat, warm the milk to 183°- 185° (not any higher), and maintain that temperature for 10 minutes. Stir it often to keep it from scorching and if it does scorch, use a stainless steel scrubby to clean your pot later.


With the milk still on the heat, while stirring, add about 1/4 Cup of white vinegar per gallon of milk. It taste better with white vinegar than cider vinegar. You do not need even to measure the vinegar, just pour in a glug, stir, look, pour in a glug, stir, etc. until the curd separates. The separation should happen right away. When the curd separates cleanly from the whey (it will look like very fine, white particles floating in the greenish whey), pour it into a cheesecloth lined colander and put the colander over another pot to save the whey for later use. Use real cheese-making cheesecloth and not the ones you can buy at the grocery store.


Tie the corners of the cloth together and hang the bag to drain for a few hours. Refrigerate your cheese after it has drained. It will keep for a couple of weeks.


Now that you have this rubbery ball of cheese, what do you do with it or how do you enjoy it


Well, Paneer is like tofu,  it will take on the flavor of the food it is cooked with. Just cut it into bite-sized cubes and throw it into chili or spaghetti.  If you love pasta cooked in whey you can always save whey just for this purpose. Try serving your chili over vermicelli cooked in whey, topped with a sprinkle of cheese, some sprouts and a dollop of goat yogurt.


You could use Paneer as a meat extender or replacement. If you are a vegetarian, you can use a lot of Paneer. You make “chicken a la king” using cubes of Paneer instead of meat. A quick dinner is mac’n cheese, made from a box, but also add onions, Paneer cubes, peas and buttermilk. When you make taco meat, cut it up in tiny cubes and simmer it with the meat for about an hour.


You can also marinade Paneer and throw it on top of salads or use it in stir-fry. Paneer is really in its element when used in curry. Serve the curry over rice cooked with whey instead of water and add a handful of raisins and a clove to the rice as well to make it really authentic.


There are endless uses for Paneer, so make some of this quick and easy cheese and experiment for yourself. Enjoy!


More Acid Cheeses Recipes for you. Check them out!


Putting Ricotta Curds in Bowl

Modern Ricotta


As Featured On EzineArticles

Ricotta Cheese Recipes


Summary


Ricotta cheese is a soft, slightly sweet, mild fresh cheese. Ricotta is similar in appearance to cottage cheese, but has a much smaller, grainier curd and slightly sweeter taste. Ricotta in Italian means “cooked again,” a reference to the fact that it is traditionally made from whey produced from making other cheeses, like mozzarella, feta or provolone. Modern ricotta, on the other hand, is generally made with fresh whole or skimmed milk to which acid is added directly. As a result, most packaged ricottas are a bit fattier and creamier than ricotta made by the traditional method.


The original cheese-making process removes the majority of the casein protein from the goat milk (the cheese) leaving behind the liquid whey portion. When left at room temperature, the original inoculating bacteria continue to act upon the remaining lactose in the whey, converting it to lactic acid, and further lowering the pH of the liquid. The lower pH reduces the solubility of the small amount of remaining protein in the whey. Heating the whey then causes the protein to precipitate out as a very fine-grained curd.


Each time when you make cheese, you end up with a lot of whey i.e., The nutritious liquid left over from curdled milk when the curds are removed. Whey contains the water-soluble proteins, vitamins, and minerals in the milk. And there are many things you can do with this leftover whey. You can use it in bread baking and soup stock, and even to cook pasta. You can even drink whey plain or sweetened. And in a pinch it can be used to ripen your cheese if you are out of culture.


Ricotta is made by using heat to precipitate – separate out the remaining albumin protein from the whey left over from making lactic acid/rennet precipitated cheeses. Usually recipes call for the use of an acid, such as vinegar in precipitating the curds. I have found, that in most cases, due to the fact that you ripen the milk as you make your hard cheese, the whey has enough acid on it’s own and does not need the extra vinegar. I also find that leaving the vinegar out creates a smoother cheese. If you use the vinegar, the cheese will tend to be slightly grainy. Ricotta is not a high yield cheese, but it is worth the effort.


Traditional Ricotta Recipe.


Ricotta Cheese in a Bowl


  • Making Ricotta is very simple. Over direct heat, heat the hard cheese whey to 200°. By the time it has reached this temperature you will see very tiny white particles – the albumin protein,  floating in the whey. The heat and acid from the ripe whey has precipitated the protein. You can add a little vinegar at this point if you really think it necessary ( 1/4 Cup. per 2 gallons of whey), it is up to you as it would not affect the Ricotta.
  • Line a colander with very fine cheesecloth, called “butter muslin”. You must use a very fine cloth here, or your cheese will pass through the regular cloth. If you do not have fine cheesecloth, use a clean cotton cloth. Place the colander over a big pot so you can save the whey and carefully pour the whey into the colander. Be very careful because the liquid is hot. Tie the ends of the cheesecloth together and hang the ricotta to drain for a couple hours.
  • When it has drained, place the ricotta in a bowl and add salt to taste. You will find that the Ricotta made from the whey of different cheeses has different tastes and textures.


In my opinion, Feta makes the strongest taste as the taste increases as it ages in the fridge. Whereas, Mozzarella makes the best. Your Ricotta will keep for a couple of weeks in the fridge. Enjoy!


* Note: You cannot make Ricotta from the whey left over from making an acid precipitated cheese such as Paneer/ Queso Blanco or whole milk Ricotta. Reason being, you have already precipitated out all the albumin protein the milk has to give using acid and heat and there is nothing left over in the remaining whey to make whey Ricotta.


Click the link Chhana to view the details.


More Soft Cheeses Recipes for Beginners. Check them out NOW!


Modern Ricotta Recipe.


Putting Ricotta Curds in Bowl


Though it is not traditional but,  it is nice to be able to make ricotta out of plain whole goat milk you can buy at the store. The Ricotta cheese  will be drier and not as smooth and creamy as the traditional  Ricotta cheese. Anyway, it tastes great and can be used as a ricotta substitute in most recipes.


Ingredients:

  • 2 quarts whole goat milk
  • 3 Tablespoons white vinegar or ¼ Cup fresh, lemon juice
  • ¼ tsp – ½ tsp salt to taste


Directions:

  • In a heavy pot, over direct heat, heat 2 quarts of whole goat milk to 200°F. Add 3 Tablespoons of white vinegar or 1/4 Cup of fresh, strained lemon juice. Make sure to bring the temperature back up to 200°F. You will realize that very tiny white particles called albumin protein, floating in the whey. The heat and acid from the ripe whey has precipitated the protein.
  • Remove the pot from the heat and set it, covered, to rest undisturbed for about 15 minutes.
  • Line a colander with very fine cheesecloth, called “butter muslin”. You must use a very fine cloth here, or your cheese will pass through the regular cloth. If you do not have fine cheesecloth, use a clean cotton cloth. Place the colander over a big pot so you can save the whey and carefully pour the whey into the colander. Be very careful because the liquid is hot. Tie the ends of the cheesecloth together and hang the ricotta to drain for an hour or so because the longer you hang it, the drier your finished cheese will be.
  • When it has drained, place the ricotta cheese  in a bowl, break up, stir and add salt to taste.


The ricotta cheese will keep for about a week in the fridge.


You can use your homemade ricotta in almost any recipe that calls for cottage cheese. It can be used instead of cream cheese to make cheesecake. You can also stir in some herbs and eat it on crackers.


Click the link Fried Cheese Sticks to view the details.

More  Goat Cheese Recipes, Check them out NOW!


Homemade Goat Milk Butter Recipe – For Beginners


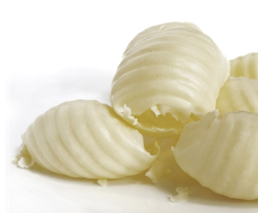
butter


Now that you have make your Cajeta, you can still continue to make your Goat Milk Butter.

As a result of the composition of goat milk butter the product has a lower melting point than regular butter, making it easy spreadable and ideally suited to applications such as the production of ice-cream! Goat milk butter does not contain carotene, so the product possesses a clear, white color. Goat milk butter is suitable for use in a wide range of applications, such as in the ice-cream, cosmetics and flavoring industries; and in the catering industry, as an ingredient in sauces, but also to fry meat.


Basic Requirements:


  • Fresh, strained Goat Milk
  • Cream Separator
  • Candy thermometer
  • Blender
  • * Optional – Butter coloring


Creating butter from your fresh goat milk is more nutritious for you than store bought butter because there are no preservatives. It is also just plain fun. With this method, you will be able to make butter quickly. No need for slow butter churns. The recipe serves 16.


  1. Goat milk is naturally homogenized, unlike cow milk, so you will need a cream separator and separate the cream from the milk.
  2. Bring the goat milk to 55 degrees either by warming or cooling in a warm or cool water bath. (pan in the sink works fine)
  3. Pour the cream into your blender. Only fill 3/4 full.
  4. Add butter coloring or yellow food coloring if desired. Goat milk butter will be a clean, white color in it’s natural state.
  5. Place top on blender and begin blending your cream with short bursts of speed. On/off for a few seconds at a time. The butter will form quickly.
  6. Pour excess liquid out of the blender.
  7. Remove butter from blender and place into a colander and rinse with very cold water.
  8. Put your rinsed butter onto a cutting board. Add 1/2 tsp per pound of butter (or to taste).
  9. Mix the salt into the butter with a spatula. Keep removing excess liquid. May help to have a towel underneath your cutting board to absorb any possible mess. Keep working the butter so you can remove as much liquid as possible.
  10. Place butter in a mold of your choice. Purchased molds are a lot of fun but you can also improvise and use things you may already have on hand. You can even use a glass square cake pan and then cut bars from it after it cools.
  11. Wrap molded butter up in plastic wrap and store in refrigerator for up to 2 weeks or freeze.


Nutritional facts

Per serving (1 teaspoon) contains 102 Calories; – Total Fat 10.8g, Cholesterol 33.8mg, Sodium 81.7mg, Carbohydrate 0.9g, Sugars 1g, Protein 0.9g, Calcium 22.2mg, Potassium 32.2mg, Phosphorus 19.4mg 


More related Goat Cheese recipes for beginners;


Goat Milk » Homemade Smoked Provolone Cheese

Smoked Provolone