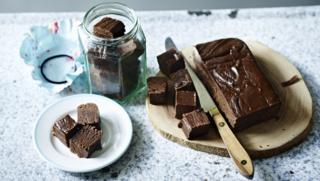
What is kefir?
Kefir is Caucasian origin fermented milk product. Kefir is an acidic, slightly foamy product made from pasteurized and fat-standardized or decreamed goat milk that has passed through a combined acidic and alcoholic fermentation of symbiotic lactic acid bacteria and yeast kefir grains. The finished product Kefir, contains 0.6 to 0.8% lactic acid and 0.5 to 1.0% alcohol. Kefir grain includes mix microbial flora. Its size varies between 0,5-3 cm. Kefir is white or white-yellow colored, and has pop-corn like appearance.
The benefits of Kefir
Kefir is easy to digest and help cell growth. Kefir is believed to expend life due to preventing flocculation of materials in intestine. Kefir is rich in protein, fat, lactose and minerals and decrease the bad cholesterol level in blood. Kefir decrease tension, dilute urine, evacuate body toxins, accelerate intestine movement, prevents hepatitis, joint diseases, diarrhea, constipation, blood lost, postpartum problems. It also decrease blood sugar but most importantly prevents cancer.
Kefir is an important nutrient for sick people and children, because it is easy to digest and rich in protein. Kefir is also beneficial for nervous problems, anorexia, ulcer, bronchitis and asthma.
How to make Kefir
There are so many ways of making Kefir, and there is almost no wrong method! Some people like to culture their grains for 12 hours, and some for 24 hours, or more. Some like to tighten the lid on the jar of fermenting kefir making it a fizzy kefir but, be sure to leave extra air space in there if you do, so the jar does not burst. Some people use raw goats milk, while others use cows milk.
Here are some simple instructions to get you started making Kefir :
- Place Kefir grains in a clean glass jar.
- For every tablespoon (approx.) of grains, add 7-8 ounces of goat milk (making one cup total per tablespoon of culture).
- Cover jar loosely, and allow to sit at room temperature, out of direct sunlight. On top of the fridge or in a cupboard are great places to make kefir. Swirl it once or twice a day to agitate the grains and expose fresh surface area to the milk.
- After 12-24 hours, strain the kefir using a strainer or colander. You can use a spoon with small holes in it to “scoop” the kefir grains out of the finished bowl of kefir, returning them to the jar.
- Enjoy your fresh Kefir, which will keep in the refrigerator for several months. Use the remaining grains to make a new batch, starting over with Step 1.
* You may also consider using your excess grains to culture rice milk, coconut milk, soy milk and etc. but kefir grains that are cultured in non-mammalian milk will cease growing.
Kefir is a natural pro-biotic, containing vitamins and enzymes that encourage digestion and live microorganisms (yeast and bacteria) also help with the digestive process. Fermentation also preserves the kefir for a time, discouraging the growth of less human-friendly molds and bacteria.
Researches showed that kefir increase potency of people. Woman use it as face-mask.
Simple Homemade Kefir Facial
Why use cultured milk facial?
This homemade cultured goat milk facial happens to be the easiest you can kick start with homemade facials. Honestly, this is one you really have to give it a try!
It consists simply of applying kefir to the face, leaving it on for about 10-15 minutes to dry, and rinsing.
Kefir is a thick, smooth, creamy substance much like sour cream, but with more body, and you actually feels a lot like facial cream as it is applied.
After using this facial continuously for two days, you may realize that your skin is smoother, softer and firmer. Perhaps, even small blemishes had disappeared.
Kefir is a cultured milk product, so it includes the alpha hydroxy acids (AHAs), lactic acid. It has also been shown to have antibiotic effects – among a multitude of other health benefits of kefir, which could potentially be a plus for those with acne problem.
If you only want one, simple homemade facial to use, this is it!
Simple Homemade Kefir Cheese
Kefir cheese is a fresh, sweet curd cheese, similar to paneer or cottage cheese . I recommend this cottage cheese because it is quick and easy to prepare, and is a rennet-free cheese.
Ingredients:
- 1 gal. Fresh goat milk
- 2 cups Kefir –preferably an extra sour kefir brewed for 2 days or 2-day refrigerated kefir, although freshly strained kefir will do
- ½ tsp. sea salt to taste
Directions:
- Heat milk to about 140°F.
- While gently stirring the milk, slowly pour kefir into the milk as a slow steady stream. Do not stir too fast or too vigorously or for too long or the curds will break apart and become un retrievable. The curds should begin separating from the whey– the whey should be reasonably clear and not milky. If the whey is still milky, either increase the heat, or add a little extra kefir (while very gently stirring for a short time only) until the whey becomes reasonably clear. Let sit for 2 minutes.
- Remove curds by skimming with a strainer.
- Place curds in either a pre-moistened cheesecloth lined colander, or in a suitable mesh-type strainer. * Optional – (Add a little sea salt in the fresh curd).
- Let curds drain for about 15 minutes. And that’s it!
* Optional – A little sea salt to taste may be added to the fresh cheese. You can add sea salt to the fresh milk prior adding kefir, or, add a little sea salt in the fresh curd.
The recipe makes a nutritious, low-fat cheese. Enjoy!
More Soft Cheeses Recipes for you. Click the link to view the details NOW!

Cottage Cheese